
https://www.youtube.com/watch?v=3GsCU4wHdmg
I found this tutorial and started creating my own photography that captured the world into 3D images. I feel that this brought to attention the world from a different perspective, my perspective.
My process with inspiration from existing method.

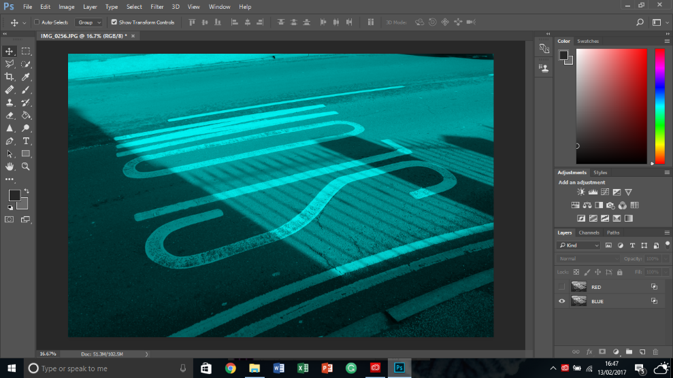
I began by opening the image into Adobe
Photoshop. I had taken the image in monochrome, using a Canon Camera. I felt
that this image would be ideal for this experiment because it’s a recognisable and common word to be found, “Slow”.

I started by creating a copy of the
layer,
which was achieved by clicking onto the
layer and then pressing down at
the
same time, ctrl + J.

I then right clicked on to one of the
layers “layer 1”, and then at the top clicked onto “blending options”.

After that has been achieved this tab,
titled “layer style” should appear.

Next I went to the “Advanced Blending”
options. I wanted the first layer to be red, so I achieved that by un-selecting
“G” standing for green and “B” standing for blue.
The red layer being achieved was made
visible by the example square.

This action created a red layer like
shown. To see this I un-selected the viability icon on the other un-changed
layer.
I renamed the layer “RED” for future
purposes.

I repeated the previous sets, however, I
wanted this layer to be cyan. This was achieved by instead of un-selecting green
and blue, I un-selected “R” = red.
I now have two layers, one being red and
the other being cyan. I intended on creating these colours because they are the
most commonly used colours for creating 3D.
I renamed the layer “BLUE” for future
purposes.

When both layers are made visible they
appear like this, because the two separate, different coloured layers merge
together.

To begin creating the 3D effect, I
clicked on the “RED” layer. I started moving it to the left by holding down
ctrl and then pressing the left key, about 6 times to achieve this example. I
repeated these steps for the “Blue”, however, I moved it to the right, using
the right key.

I wanted it to seem more distorted, so I
continued to move the two layers apart.
No comments:
Post a Comment